
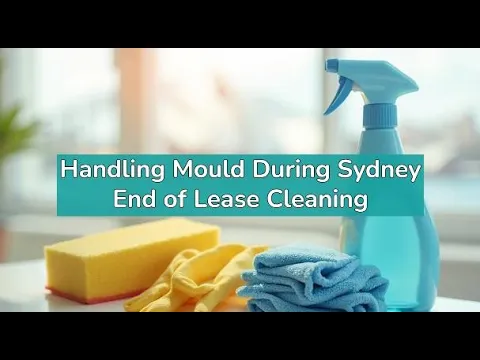
Handling Mould During Sydney End of Lease Cleaning
Mould infestation is one of the most significant issues tenants often face when performing a thorough end of lease cleaning in Sydney. Mould is a type of fungus that thrives in dark, humid environments. Sydney’s humid coastal weather and Victorian style dwellings allow mould spores to grow and spread, causing various health risks, such as respiratory disorders, skin allergies, triggering pre existing asthma, etc.
When preparing your leased property for the final inspection, overlooked mould stains can easily put your hard earned bond money at risk. Landlords and property managers in NSW expect the property must be returned in a clean and habitable condition. It is essential to ensure proper ventilation in bathrooms and to treat black or grey patches on walls, dark areas, ceilings, carpets, grout, and furniture to secure your full bond. If you don’t know how to get started with the process, check out the following tips to combat mould during a quality end of lease cleaning session in Sydney, NSW. Ensure you refer to the entry condition report to check for existing damage and dirt to avoid fair bond deductions or tackle the gunk in the best possible way.
- Landlord Vs. Tenant: Who is Responsible for Treating Mould in Sydney Rentals
- Why Treating Mould is Crucial For Bond Refund
- How to Identify the Source of Mould
- Safety Precautions and Preparations
- Pay Attention to Damp Zones: Bathrooms and a Laundry Room
- Carefully Remove Mould From Walls and Ceiling
- Treat Mouldy Windows: Frames, Tracks and Sills
- Combat Mould From Curtains and Blinds
- Clean Mould Laden Carpets
- Remove Mould From Outdoor Areas
- Focus on Hidden or Overlooked Areas
- Infographic: How to Tackle Mould During an end of lease cleaning
- Wrapping Up
1. Landlord Vs. Tenant: Who is Responsible for Treating Mould in Sydney Rentals
Inadequate ventilation is one of the key reasons for indoor mould and mildew infestations. However, understanding who is responsible for handling mould can be tricky at the end of a lease.
However, under the Residential Tenancies Laws in NSW, it is a landlord’s responsibility to fix the issue if mould develops due to moisture buildup, if they failed to repair a defective window within a given time, or the property didn’t have proper ventilation. Pre existing mould spores at the start of the tenancy are also the landlord’s responsibility to fix. Moreover, if there is damage that makes the property unsafe and poses health risks, such as mould, then the landlord can’t deduct your bond.
On the other hand, the tenant is responsible for handling mould spores if the fungi develop during the tenancy due to moisture buildup or poor ventilation in the bathroom or basement. Leaving carpets damp and dirty can also lead to mould growth, resulting in bond deductions. As a tenant, it is your responsibility to notify your landlord as soon as you see any signs of mould or condensation during the tenancy for a stress free experience.
When treating mould stains, use effective, homemade cleaning products to achieve spotless results.
2. Why Treating Mould is Crucial For Bond Refund
Landlords and property managers conduct a thorough inspection before releasing your bond. They check every inch of the premises, including dark, damp areas such as bathroom tiles, behind toilet seats, under the kitchen sink, basement walls, ceiling walls, and the area around windows. If you fail to return the property in a pristine state minus normal wear and tear, they can deduct your bond to cover cleaning costs.
It is because mould spores pose a real threat to the building structure and human health. These can pose serious health risks, making the property uninhabitable for new occupants. So, ensure you thorough inspect your rental home and consider mould removal strategies in your quality end of lease cleaning Sydney checklist.
3. How to Identify the Source of Mould
Before getting into the process, ensure you inspect and address the source of mould infestation. The common causes are:- Poor ventilation in kitchens and bathrooms
- Window Condensation
- Damp and dirt laden delicate floor coverings and furnishings
- Steamy showers
- Dirt on exhaust fans
- Plumbing leaks
- Rainwater seepage
If the issue is due to structural property damage or pipe leakage, document it with photos and instantly notify your property manager. It is because you are not held responsible for the mould caused by the landlord’s maintenance issues.
4. Safety Precautions and Preparations
It is essential to follow safety protocols when tackling mould in your rental home in Sydney. Ensure you wear protective gear, such as rubber gloves, a face mask and safety goggles, to prevent allergy triggers. Keep doors and windows open to promote cross ventilation. Remove all decor items and picture frames from walls, remove accumulated dust, etc.
When it comes to preparation, stock up on natural cleaning products, such as white vinegar, hydrogen peroxide, borax powder, tea tree oil, hot water, scrubbing brushes, sponges, a magic eraser and microfibre cloths.
Tip: Always spot test the solution on painted walls, carpets, and natural stone surfaces to prevent permanent damage and costly repairs.
5. Pay Attention to Damp Zones: Bathrooms and a Laundry Room

Landlords thoroughly check bathroom fixtures, fittings, and tiled surfaces for rust stains, mineral deposits, and, of course, mould growth. These fungi thrive in moist environments. You can follow these hacks for spotless results:
- Shower Screens:Use white vinegar spray to remove soap scum and mould from shower glass doors and screens
- Tile Grout:Apply 3% hydrogen peroxide between grout lines of bathroom tiles and leave it for a few minutes. Next, scrub it with an old toothbrush and rinse the area. Ensure you wipe dry to prevent re growth.
- Exhaust Fan Vents:Vacuum your exhaust fans, then spray a vinegar solution to remove mould spores. Scrub, rinse and wipe it dry.
- Behind a Toilet Seat: You can either use hydrogen peroxide or vinegar on the surface. Next, gently rub the area with a brush for a spotless shine.
6. Carefully Remove Mould From Walls and Ceiling
With a step stool, you can easily reach the ceiling. Start by eliminating loose dust particles and cobwebs. If you spot mould stains on the walls, spray the homemade cleaning solution (vinegar) onto the affected area and let it saturate for 10 to 20 minutes. This will break down the spores.
Instead of using an abrasive brush, use a sponge or a damp magic eraser to scrub the stains gently. Gently scrub in a circular motion to prevent damage. Now, use a damp cloth and wipe down the ceilings. Ensure you dry the entire surface to prevent moisture buildup.
You may need your landlord’s permission to make necessary repairs or renovations, such as repainting walls, before the final inspection. Make sure you clean couches and tables when cleaning a furnished property at the end of your tenancy.
7. Treat Mouldy Windows: Frames, Tracks and Sills
First things first! Get rid of visible dirt, bird droppings, dust bunnies and grime using a damp microfibre cloth. Clean window tracks and other crannies using a vacuum machine with a crevice brush attachment. This makes it easy to tackle mould stains easily.
Next, prepare a DIY cleaning solution by mixing equal parts of distilled vinegar and warm water into a spray bottle. It is good to add a few drops of tea tree oil to kill mould spores. Spray onto the window frames, tracks, sills and panes and leave it for a few minutes. After that, gently scrub the area with a sponge and wipe the surface dry. Use a rubber squeegee to remove excess water and solution residue. This will prevent unpleasant streaks with perfection.
8. Combat Mould From Curtains and Blinds
There is no denying that fabric materials tend to hold on to moisture, providing a perfect environment for mould growth in a poorly ventilated area. You can use borax powder to remove mould from curtains and blinds. It is good to toss curtains in the washing machine and set the hot water cycle to kill spores. White vinegar can also do wonders when cleaning blinds.
9. Clean Mould Laden Carpets
Does your carpet appear discoloured? Does it have green/brown/black stains? A musty odour is also a red flag that your carpet needs a treatment before the final rental inspection.
The first step is to vacuuming your carpets thoroughly, covering every inch of it. Next, apply the vinegar solution and leave it for a few minutes to eliminate mould stains. Gently remove using a damp cloth or a soft bristled brush. After that, sprinkle baking soda and leave it overnight or until you vacuum clean it. This will refresh your entire carpet and leave a great impression on your landlord. You can choose between steam vs dry carpet cleaning when preparing it for the final rental inspection.
10. Remove Mould From Outdoor Areas
Mould can appear on siding, decks, and patio areas if not cleaned regularly. You can spray a vinegar and warm water solution onto the affected area and let it sit for 20 minutes. Next, scrub any tough stains with a bristle brush or use a pressure washing technique for driveways and other concrete surfaces. You can also hire experts for a budget end of lease cleaning Sydney to secure your hard earned bond money.
11. Focus on Hidden or Overlooked Areas
During the final rental inspection, real estate inspectors in Sydney check tiny areas where mould may thrive or grow. Ensure you clean these areas:
- Underneath an oven, using a baking soda paste
- Behind washing machines
- Inside your fridge
- Under sinks
- Behind fridges
- Air conditioning vents
- Door seals, etc
It is vital to document everything in the form of photos and videos to prevent disputes or unnecessary bond deductions.
Infographic: How to Tackle Mould During an end of lease cleaning

Wrapping Up
Tackling mould stains during end of lease cleaning process in Sydney requires all safety measures, proper cleaning tools, products and techniques for the best possible results. Ensure you establish good communication with your property manager and fix the issue before the final rental inspection to secure your bond.